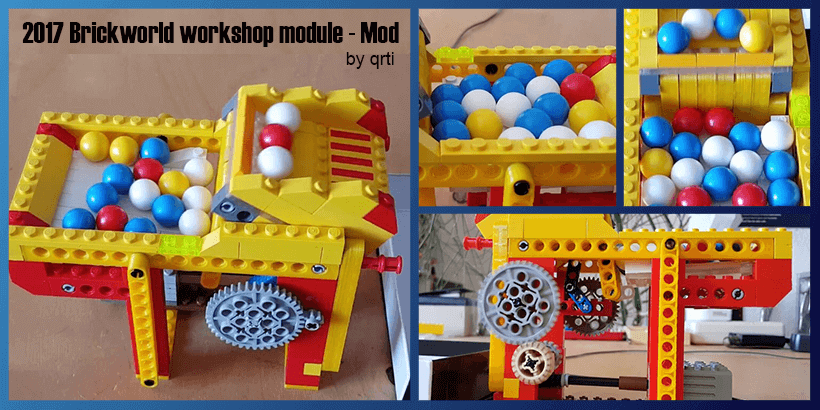
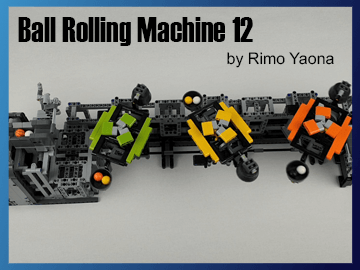
Looking for a super compact LEGO Great Ball Contraption ? Meet the adaptation of the Brickworld 2017 Workshop module designed by qrti! This German LEGO designer has created free building instructions to reproduce an alternative version from the LEGO GBC proposed to some lucky participants to Brickworld 2017 edition (and initially designed by Bryan Bonahoom). Kurt “Qrti” used LEGO Technic bricks to build his marble run machine whose mechanism is relatively simple but smart in design. A platform is oscillating up and down, collecting GBC balls once down and expulsing them when up. Some LEGO Technic liftarms are preventing the balls from going underneath the rotating platform when up. Small but powerful, and ready to be built with your kids.
Original design by: qrti
Number of parts: 162
Complexity for building: 
Price for Building: €, cheap
Adaptation of Brickworld 2017 Workshop Module , on qrti YouTube channel
Advertisement
 module, designed by qrti")

Planet GBC Building Instructions and Ready-to-Build LEGO sets are just waiting for you !


Buy your GBC balls without breaking the bank !!
Quercetti marbles - 100 balls refill
GBC-compatible balls
Best Price6.90 EUR
Buy NOW


Looks like there are two jumpers that need to be replacing the 1×2 plates on top of the two 1×2 Technic Bricks w/hole that hold up the back end of the landing tray (the tiled plate). This allows the plate to sit 1/2 stud back. Additionally the instructions show the rocker assembly sitting flush with both the 1×6 Technic Brick and the 1/2 Technic brick, but the 1×6 pin connection should be shifted forward one. The 1×6 should sit flush with the back of the rocker assembly, and the 1×2 should be set in one stud.
I think something might be slightly off in the instructions. The video has slightly different alignment in the rocker, and moving it forward or back a stud either makes it too close or too far to function. Maybe something I just missed, will keep looking at the build.
The beams and technic bricks look like they are 3rd printed.
Quercetti Balls for the beams. I don’t know about LEGO Technic bricks (could be the video quality 😊)
it’s not the video quality. U can see the lines from each layer. like on any other FDM printed part.